Containerization offers us a way to create a development environment perfectly tailored per project, with all the necessary tools and libraries pre-installed and readily available. No scrambling for dependencies or battling compatibility issues (say between OSes oe even two projects).
Trade-offs
- time put into setting up the environment
- in this article we’ll be using a VS Code extension called Dev Containers which simplifies the process by leaps
- little learning curve even after things have been setup
- additional resource usage and disk space
- the containers and images have to be manually deleted when you’re done with the project
Dockerized Development
Docker uses containers, lightweight and portable environments, to package your application and all its dependencies. This creates a consistent and isolated development experience across different machines, regardless of the underlying operating system.
Benefits of Dockerized Development:
- Repeatable Environments: Say goodbye to “it works on my machine” syndrome! Docker ensures everyone on your team works with an identical environment, boosting collaboration and reproducibility.
- Streamlined Workflow: No more hunting for missing libraries or facing dependency conflicts. Docker containers bundle everything your application needs to run, saving you valuable time and frustration.
- Portability: Docker containers are self-contained, making it easy to share your development environment with colleagues or deploy your application to different platforms.
- Version Control: Treat your development environment like any other code. Version control systems like Git can track changes to your Dockerfile, ensuring clear documentation and historical snapshots of your development setup.
Getting Started with Dockerized Development:
We’ll be using:
Points to bear in mind
- No need to install the dependencies on local/host machine. All the dependencies are pre installed in the docker container.
- The local project/workspace folder will be mapped as a folder in the Docker container. This allows you to access the files and folders from the host machine and share the same file system within the docker container.
- This article doesn’t cover configuring docker for deployment.
Tutorial
We’ll work with a simple python application.
-
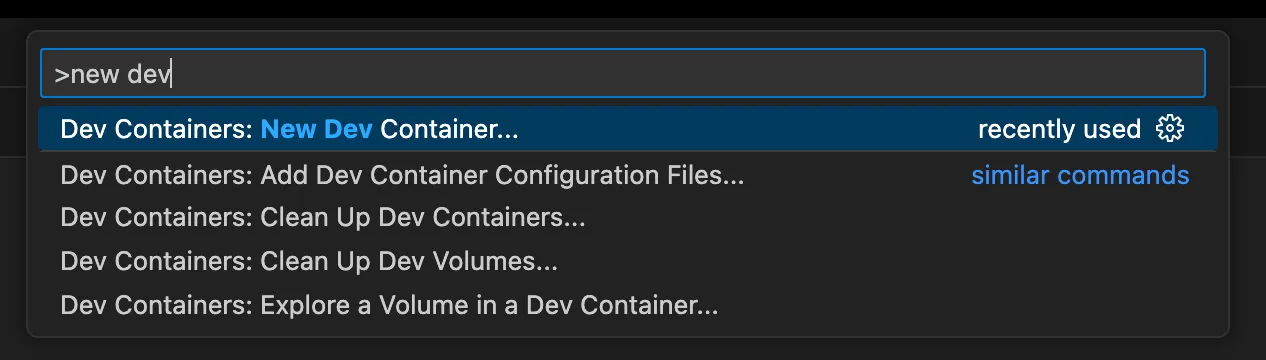
In VS Code, open the Command palette (F1) and search and select for “Dev Containers: New Dev Container…“.
-
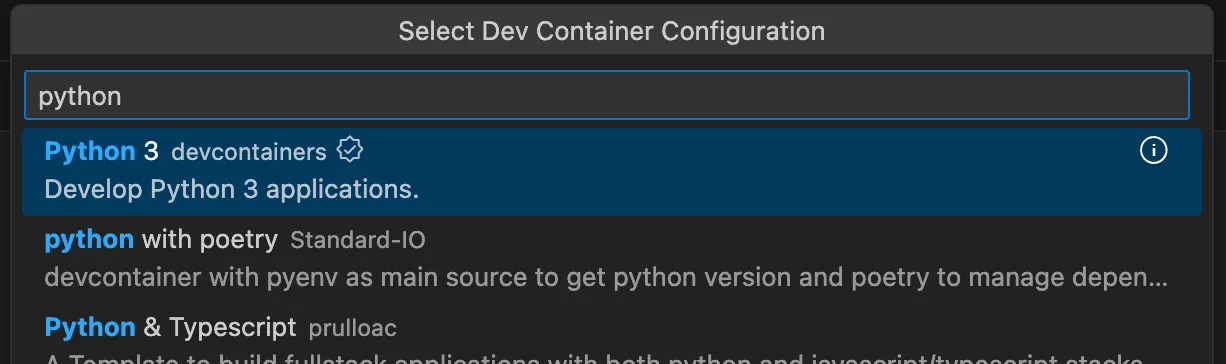
Select “Python” in the next screen.
-
Next, “Create Dev Container”.
 You may explore the option “Additional Options”, under which you’d find which version of python you want to use.
Give VS Code some time to:
- create the dev container file
- start/connect to docker
- create a container
- build an environment (linux)
- create a workspace with appropriate permissions
- add mounts to the container
- connect VS Code to the container
-
Check the docker dashboard for the created container. It’ll look something like in the image below with a random name.

-
At the bottom left of VS code look for the connection indicator.

-
In VS Code, in the root of your workspace, create a new python file and write the following code and save it as hello.py.
print("Hello World!") -
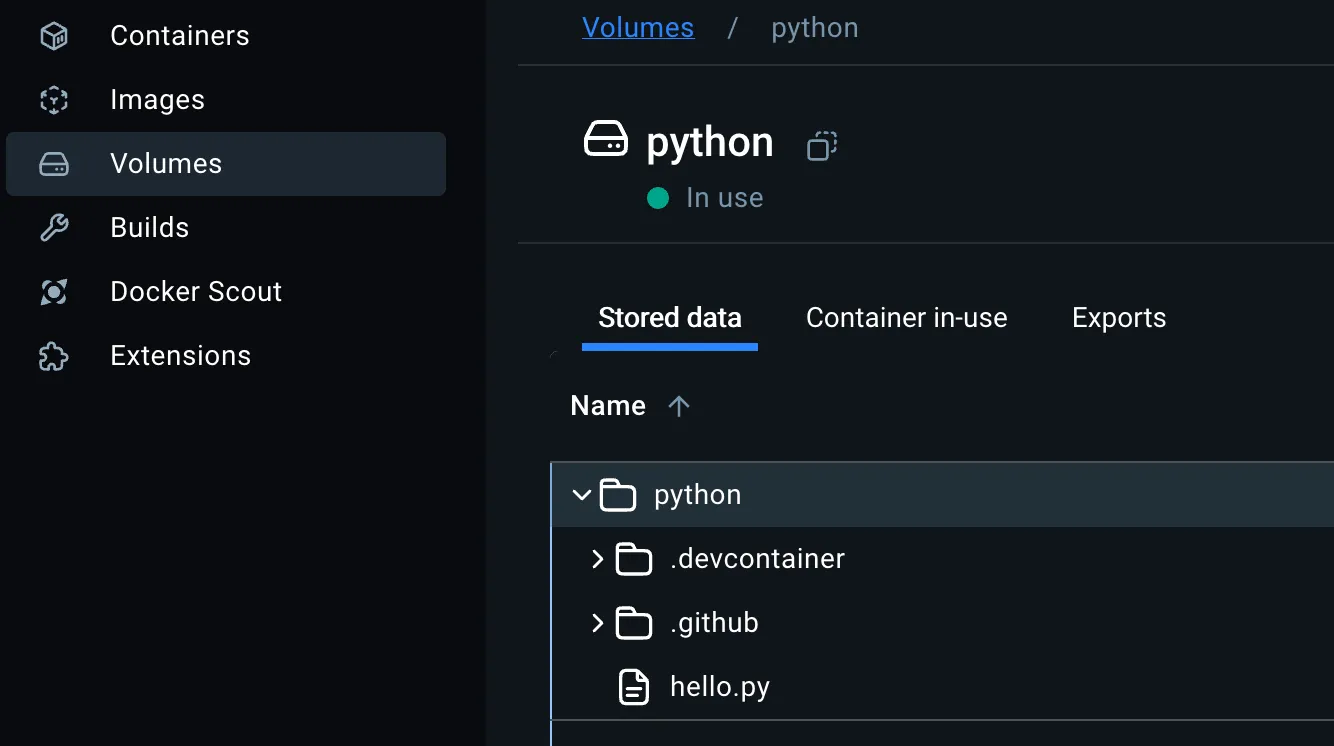
Find the same file show up in the Docker container (Docker Desktop > Volumes > Python)
-
To run the python file in the container:
- Open a new terminal inside VS Code.
- It will open the active workspace folder. To list the files you may execute
lscommand. - Execute
python3 hello.py
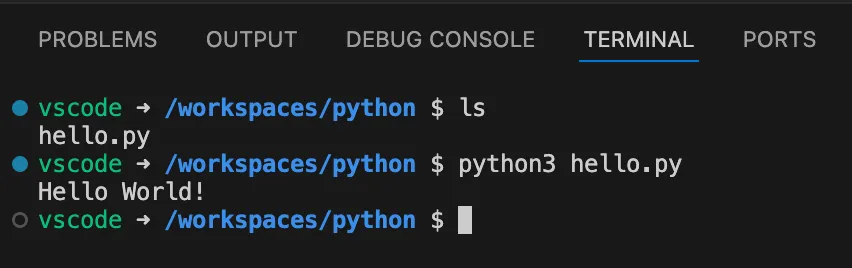
You should see the output “Hello World!”